 Skip to content


How to Install Solar Panels on an RV? -All You Need to Know!


How do you install solar panels on your RV? What are the necessary steps and tools? How can you wire them correctly and safely?
In this blog post, we will answer these questions and more. Discover the process for mounting solar panels on your RV roof, connecting them to a charge controller, and wiring them to a battery, among other details.
By the end of this post, you'll have a clear understanding of how to install solar panels on your RV so you can enjoy the benefits of solar power.
Let's dive into the blog!
RV Solar Panel Installation Wiring Diagram
Before we delve into the details of how to install solar panels on your RV, let's take a look at a basic wiring diagram that shows how the components are connected.

So, How Do I Hook up Solar Panels to My RV?
Now that you have a general idea of how an RV solar system works, let's see how to hook up solar panels to your RV step by step.
Supplies for Mounting Solar Panels
To begin with, you need to gather some tools and materials for installing solar panels on your RV roof. Here is a list of the essentials:
- Cordless drill.
- Screws or adhesives.
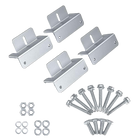
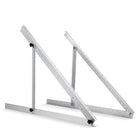
- Mounting brackets. Attached to the solar panels and fix them to the roof. There are Z-brackets, L-brackets, or adjustable tilt mounts available.
- Butyl tape. Seals the holes and prevents water leaks.
- Dicor self-leveling lap sealant. Covers the butyl tape and creates a waterproof barrier.
- Wire clips. To secure the wires along the roof.
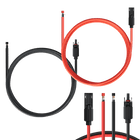
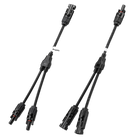
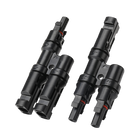
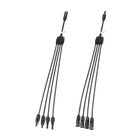
- MC4 connectors. Allow you to plug and unplug the solar panel wires easily and safely.
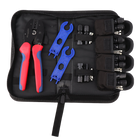
- Wire stripper/crimper. Strip and crimp the wires that connect the solar panels to the charge controller and battery.
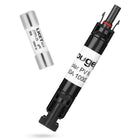
- Fuse holder and fuse: Protect the wires from short circuits and overcurrents.
By the way, ensure that the solar panels, charge controller, and batteries are compatible with their voltage and current specifications.
Once you have all the supplies ready, you can start mounting the solar panels on your RV roof. Here are the steps to follow:
Step 1: Plan the Layout of Your Solar Panels on the RV Roof
Plan ahead and decide where to install the solar panels on your RV's roof. For optimal performance in the Northern Hemisphere, your solar panels should ideally face south and be tilted at an angle between 30° to 45°. However, the optimal tilt angle varies with seasons and geographic location, so using adjustable mounts can be beneficial for maximizing efficiency year-round.
Besides, ensure that the solar panels are not shaded by trees, vents, or other structures that could reduce their exposure to sunlight.
Step 2: Fix Panels With Screws or Adhesives
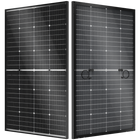
Solar panels are typically mounted to roofs using screws or adhesives. Rigid monocrystalline solar panels are often secured by screwing, which involves drilling holes in the panel frame and attaching the solar panels to the mounting brackets with screws. This is the most common and secure method, providing a strong and stable connection between your solar panels and the RV roof. With tiltable mounting brackets, you can adjust the angle and position of your panels as needed.
However, screwing requires more tools, time, and skill, as well as creating additional holes in the roof that need to be properly sealed. It's also necessary to regularly check the sealant and reapply it if it cracks or peels off.
However, screwing requires more tools, time, and skill, as well as creating more holes in the roof that need to be sealed. You will also need to check the sealant regularly and reapply it if it cracks or peels off.
Step 3: Connect the Solar Panels: Series vs. Parallel
When using multiple solar panels, you can connect them either in series or parallel (or use a combination of both), depending on the desired system voltage and amperage or the specific configuration needs.
Wiring Solar Panels in Parallel

Wiring solar panels in parallel involves connecting all the positive terminals of the panels to each other, and likewise with the negative terminals. In a parallel arrangement, the voltage of the system remains the same as the voltage of a single panel, but the current is cumulative.
When you wire solar panels in parallel, you may need thicker wires to handle the higher total amperage and to prevent voltage drop over long distances, particularly when using a significant number of panels.
Parallel wiring also increases the risk of shading issues that can reduce your system's performance. If one or more panels are partially or fully blocked by a tree, a building, or another panel, the shaded panels will generate less current than the unshaded ones, leading to reduced overall system efficiency.
Wiring Solar Panels in Series

Series wiring involves connecting the positive terminal of one solar panel to the negative terminal of another, forming a chain. This method increases the total voltage output of your system while keeping the current consistent. An MPPT (Maximum Power Point Tracking) controller can efficiently convert the higher voltage produced by series-connected solar panels into the appropriate charging voltage for the batteries.
However, series wiring also raises the potential for voltage drop issues, which can impair your system's performance. Voltage drop occurs when there is resistance in the wires or connections between the solar panels and the charge controller, causing some of the voltage generated by the panels to be lost en route to the batteries.
To mitigate voltage drop problems, you should use high-quality wires and connectors with low resistance. Additionally, keep wire runs as short as possible and avoid unnecessary bends or twists that can increase resistance.
Wiring Solar Panels in Series-Parallel
Wiring solar panels in series-parallel involves grouping several panels in series and then connecting those groups in parallel.
Series-parallel configuration allows you to increase both the voltage and current output of your system while balancing some of the drawbacks associated with each wiring method. However, series-parallel wiring also adds complexity and cost to your system due to the need for additional wires and connectors.
To wire solar panels in series-parallel, you should follow the same principles and precautions associated with both parallel and series wiring, tailored to the specific configuration of your system.
Ensure to match the voltage and current output of your solar panel system to the input requirements of your charge controller and battery bank.
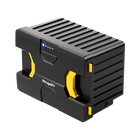
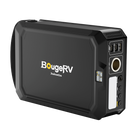
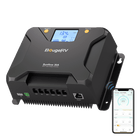
Step 4: Install a Charge Controller in an Accessible Location

Install the charge controller in a location where it is easily visible and accessible, such as near the battery bank. Ensure your solar charge controller is situated in a well-ventilated area to prevent overheating.
A charge controller regulates the voltage and current from the solar panels, preventing overcharging and undercharging that can damage your batteries. It also allows you to monitor the status of your solar panel installation.
Basic models may display the battery load, its state, and the solar panels' voltage, while advanced charge controllers can provide additional information such as temperature and charging time or offer control via smartphone through Bluetooth.
Tips:
Ensure that your charge controller is compatible with the type and size of your batteries and solar panels.
Do not wire your solar panels directly to the RV battery, as it might overheat and potentially explode due to the high voltage from the solar panels.
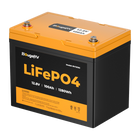
Step 5: Connect the Charge Controller to the Battery
The charge controller will have two sets of terminals: one for connecting to the battery and another for connecting to the solar panels.
To connect the charge controller to the RV batteries, run a set of wires as follows:
-
Connect the positive wire from the charge controller's battery output terminal to the positive terminal of the battery bank.
-
Connect the negative wire from the charge controller's battery output terminal to the negative terminal of the battery bank.
The exact wiring diagram will depend on the specific type of charge controller you have, so be sure to follow the instructions that come with your unit.
Step 6: Connect the Charge Controller with Solar Panels
The easiest way to connect the solar charge controller to the solar panels is by using the fridge vent or another existing hole on the roof through which you can pass the wires. To run the solar panel wires to your charge controller using the fridge vent, follow these steps:
-
Remove the vent cover, and locate the opening where the fridge exhausts hot air. It should be near the back of the vent.
-
Use MC4 connectors to connect solar panel cables.
-
Run the wires from the solar panels through the opening and down the vent.
-
Connect the positive cable from the solar panels to the positive terminal of the charge controller marked for solar panel input (often labeled as 'PV+' or 'Solar+'). Then, connect the negative cable from the solar panels to the negative terminal of the charge controller marked for solar panel input (often labeled as 'PV-' or 'Solar-').
-
Secure the wires along the roof with wire clips or cable ties.
-
Screw the vent cover back on or snap it into place and seal the vent properly.
- Ensure all connections are tight and secure, use appropriate fuses, and consider installing a battery disconnect switch for safety.
Apart from using a fridge vent, you can run the solar panel wire through any existing holes or openings on the roof, or you may also drill custom holes in the roof.
It is crucial to follow the specific instructions provided by the manufacturers of your solar panels, charge controller, and batteries to ensure compatibility, optimal performance, and safe operation. If in doubt, consult a professional electrician or an experienced RV solar installer.
Step 7: Add Inverter to Power RV Appliances
An inverter converts the DC power from the solar panels and batteries into AC power, which is necessary to run most of your RV appliances, such as TVs, microwaves, or air conditioners.
To properly install the inverter, place it close to the battery to minimize power loss and connect it to your battery bank using fuses and cables that are appropriately sized for the current it will carry.
Once installed, you can plug your appliances directly into the inverter's outlets or connect them to your RV's existing AC distribution panel. For added flexibility, consider installing a transfer switch, which enables easy switching between shore power and solar power.
Tips:
Ensure that your inverter can handle the wattage and surge power of your appliances, as well as the size and type of your battery bank.
Seek professional help if you feel it is necessary.
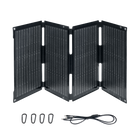
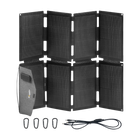
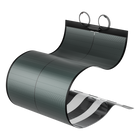
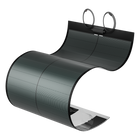
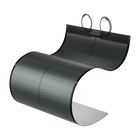
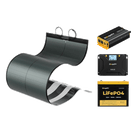
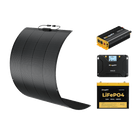
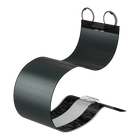
How to Install Flexible Solar Panels on RV?

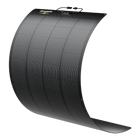
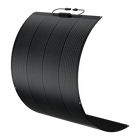
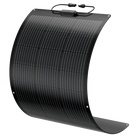
Flexible solar panels are ideal for RVs with curved or uneven roofs, as well as those with limited roof space. Additionally, flexible solar panels tend to be more resistant to impact and shading compared to rigid solar panels.
To install a flexible solar panel, you need to apply a strong, compatible adhesive—such as VHB tape or Eternabond tape—on the back of the solar panel frame and adhere it directly to the mounting brackets or the roof surface. This method is easy and quick, requiring no drilling or bolting, which can save both time and money.
Besides using double-sided adhesive tape, glue, or Velcro to affix the flexible solar panel to your RV roof without causing damage or peeling, you can opt for flexible solar panels that come with a strong pre-applied adhesive. For instance, BougeRV’s CIGS thin-film flexible solar panels include an adhesive backing for secure installation on the roof. To install CIGS thin-film flexible solar panels with adhesive on your RV, please refer to our blog: A Quick Guide for CIGS Solar Panel Installation.
If you have flexible solar panels without pre-applied adhesive, follow these steps for installation:
-
Plan the placement of your solar panels on the RV’s roof, making sure they are clear of any obstructions like vents or antennas. Allow for a buffer zone along the edges for airflow and potential expansion.
-
Clean and dry the area of the roof where the panels will be placed.
-
Remove the protective backing from one side of each panel.
-
Apply a thin layer of adhesive to each panel.
-
Press each panel firmly on the roof and smooth out any air bubbles or wrinkles.
-
Connect each solar panel to its corresponding wire using MC4 connectors.
-
Connect the wiring from the charge controller to the battery.
-
Connect the wiring from the solar panels to the solar charge controller.
-
Test your system by turning on some appliances in your RV and checking the readings on the battery monitor.
Installing Solar Panels on RV TPO Roof
There are different types of roofs for RVs, such as rubber, fiberglass, or metal. One of the common types is TPO, which is a durable, lightweight UV-resistant, and weather-resistant synthetic material. However, TPO can also be slippery and difficult to adhere to.
To install solar panels on a TPO roof, you will need a mounting system that can secure the solar panels without damaging or puncturing the roof. There are mounting system options, such as brackets, rails, or adhesive pads.
How to Mount Large Solar Panels on RV With No Drilling?
Large and powerful solar panels require a robust mounting system to support their weight and endure the forces of wind and vibration during travel. To attach large solar panels without drilling, you can opt for a non-penetrating mounting system that utilizes brackets, clamps, rails, and bolts to secure the panels firmly.
Here are some steps to follow:
-
Plan the layout of your solar panels on the roof of your RV.
-
Assemble the non-penetrating mounting system according to the manufacturer's instructions. This system includes brackets that anchor to the sides of your RV's roof, clamps that grip the solar panels securely, rails that bridge the brackets and clamps, and bolts to tighten everything together.
-
Position the solar panels atop the assembled rails and clamps, and fasten them into place using the provided bolts.
-
Then, proceed with wiring as the above section "How Do I Hook up Solar Panels to My RV?" for connecting your solar array to your RV's electrical system.
Tips:
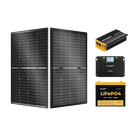
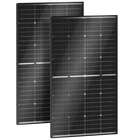
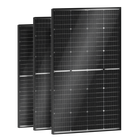
If you plan to invest in a solar panel with high power output, we recommend using compact solar panels with considerable output and high conversion rates, such as BougeRV's 300W 10BB solar panels.
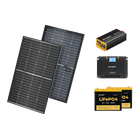
BougeRV's Solar Panels for RV
Hunting for solar panels that promise high efficiency, affordability, durability, and hassle-free installation for your RV? Explore BougeRV's solar panels for RV and power up your journey with ease!
Crafted with advanced 9BB, 10BB, or even 16BB Monocrystalline silicon cells, our monofacial and bifacial solar panels boast an impressive conversion rate of up to 25%. The size of our solar panels gets smaller, while the power output soars, ensuring they fit seamlessly with any of your system size and configuration. They are also durable, waterproof, corrosion-resistant, and have a 12-year warranty at BougeRV.com.
Besides, BougeRV’s CIGS thin-film flexible solar panels with adhesive can be easily mounted on your RV roof without drilling holes.
Come in different sizes and wattages, from 100W to 400W, BougeRV’s solar panels suit your system needs and budget. You can also easily find the installation kit that includes a solar charge controller, mounting brackets, a wiring kit, and a user manual for RV installation.
If you have any inquiries about our solar panels or the installation process, rest assured that our amiable and proficient customer service team is on standby to swiftly address and resolve your questions.
Conclusion

Till now, you've learned the complete and straightforward process of installing solar panels on an RV. This includes mounting both flexible solar panels and large solar panels on the RV roof without drilling. Now, install your solar panels on the RV to power your RV and enjoy the benefits of solar energy!
If you're in search of high-quality, affordable, and easy-to-install solar panels, consider checking out BougeRV's selection of solar panels for your needs.
FAQs
How Many Solar Panels Do I Need to Run an RV?
A simple way to estimate the number of solar panels you need is to divide your daily power consumption by the electricity that can be generated by a single solar panel per day.
For example, if you need 5000Wh daily and each 400W solar panel can produce an average of 2400Wh per day (assuming 6 hours of peak sunlight), you would need at least two 400W solar panels. 5000Wh÷(600W×4) ≈2
How Many Watts of Solar Do You Need to Run an Entire RV?
The amount of solar power you need to run an RV depends on your daily energy consumption:
If you require 5,000 watts a day, two 400-watt solar panels are needed to power your RV's devices and appliances.
A large RV with a TV, air-conditioning, and a large fridge will likely need at least four 200-watt solar panels.
If you have two 12-volt batteries that equal between 200 to 250 AH, your solar panel output should be no less than 600 watts.
How Many Solar Panels Do I Need to Run a 30 Amp RV?
To run a 30 Amp RV, which could draw up to 3600 watts at full capacity, with 6 peak sunlight hours per day, you'd need three 200-watt solar panels for typical use. This assumes ideal conditions and sufficient battery storage for energy collected, so you may need more panels to cover inefficiencies or less-than-ideal solar conditions.
Will Solar Panel Keep My RV Battery Charged?
Yes, solar panels will keep your RV battery charged as long as there is enough sunlight and your system is properly connected and configured. As long as your battery has enough capacity to store the excess electricity from the solar panels, it will remain charged and ready to use.
Can Solar Panels Run RV Air Conditioner?
Yes, solar panels can run RV air conditioners as long as there is enough sunlight and your system is powerful enough to handle the load. Air conditioners are one of the most energy-intensive appliances in an RV, consuming anywhere from 1000W to 3000W depending on the size and model. Additionally, you will need an inverter that converts the DC electricity from the batteries into AC electricity that powers the air conditioner.
How Efficient Are RV Solar Panels?
Most RV solar panels have an efficiency rating between 15% and 20%, meaning they produce 15 to 20 watts of power per square foot of the panel. At BougeRV, we offer RV solar panels with efficiency ratings of up to 23%.
How Much Does It Cost to Add Solar to an RV?
There are two main types of RV solar systems: roof-mounted and portable. Roof-mounted systems are fixed on the roof of your RV and are connected to a charge controller, a battery bank, and an inverter. Portable systems are standalone units that you can move around and plug into your RV's electrical system.
A typical roof-mounted system for an average RV can cost anywhere from $1,000 to $5,000 or more. In contrast, a typical portable system for an average RV can cost anywhere from $200 to $1,000 or more.
How Long Do Solar Panels Last on an RV?
A common warranty for RV solar panels is 25 years at 80% output. This means that after 25 years, the solar panel will still produce at least 80% of its rated power when it’s new. However, this doesn’t mean that the panel will stop working after 25 years. It just means that it will produce less power than before.
Can Solar Panels Be Installed on an RV or Camper Permanently?
Solar panels can be installed on an RV or camper permanently, as long as you have enough space and clearance on your roof. You will need to make sure that your roof can support the weight and wind load of the panels. You will also need to drill holes in your roof to mount the panels and run wires to connect them to your electrical system.
Should You Cover RV Solar Panels When Not in Use?
Covering your panels will prevent them from charging your batteries and may cause damage or overheating.
The only time you may want to cover your panels is when you are storing your RV for a long time in a place where there is snow or ice accumulation on your roof. In that case, you may want to cover your panels with a breathable material that can protect them from moisture and weight.
Are Solar Panels on RV Worth It?
Solar panels on an RV can provide you with many benefits, such as:
-
Saving money on fuel and campground fees by reducing your dependence on generators and shore power.
-
Extending your battery life by keeping them charged and healthy.
-
Reducing your carbon footprint by using clean and renewable energy.
-
Enhancing your comfort and convenience by allowing you to use more appliances and devices without worrying about running out of power.
-
Increasing your freedom and flexibility by enabling you to camp anywhere without hookups.
However, solar panels on RVs also have some drawbacks, such as:
-
High upfront costs may take a long time to pay off.
-
Limited power output that may not meet your high-demand needs.
-
Variable performance that depends on the weather and season.
-
Maintenance and repair issues that may arise over time.
-
Installation and wiring challenges that may require professional help.
Ultimately, the decision to install solar panels on your RV depends on how much you value the benefits and how much you can afford the costs. You will need to do some research and calculations to determine if solar panels are worth it for you.


