7 Simple Steps to Clean a Portable AC Unit

Your trusty portable air conditioner likely needs some TLC if you're reading this. Keeping your portable AC unit clean isn't just about beating the heat more efficiently; it's also about ensuring it runs smoothly for years.
So, let's dive into the step-by-step process of cleaning your portable AC unit. Grab your tools, put on some tunes, and let's get started!
Why Cleaning Your Portable AC Unit Matters?

Before we get our hands dirty, let's talk about why cleaning your portable AC unit is crucial. Regular maintenance:
-
Improves Efficiency: Dirty filters and coils can reduce your unit's efficiency, consuming more electricity.
-
Extends Lifespan: A clean machine lasts longer.
-
Enhances Air Quality: Dust and mold in the unit can affect indoor air quality.
-
Reduces Allergens: Less dust means fewer allergens circulating through your home.
What You'll Need
Here’s a list of things you’ll need before we dive in:
- Screwdriver
- Soft cloths or rags
- Vacuum with a brush attachment
- Mild detergent
- Warm water
- Spray bottle
- Soft brush
- Compressed air (optional)
Now, Let’s Explore the 7 Easy Steps to Clean Your Portable AC Unit
Step 1: Turn Off and Unplug the Unit
Safety first! Ensure your portable AC unit is turned off and unplugged from the wall outlet or battery bank. This prevents any electrical hazards while you’re cleaning.
Step 2: Remove and Clean Filters

Portable AC units usually have easily removable filters. These are usually located at the back or side of the unit. Here’s how to clean them:
- Gently slide the filter out of the unit.
- Use your vacuum's brush attachment to remove loose dust and debris.
- Mix mild detergent with warm water and soak the filter for about 10 minutes. Rinse the filter thoroughly with water and let it air dry completely before reinstalling.
Step 3: Clean the Coils
Cleaning the evaporator and condenser coils is essential for efficient performance. Here’s how to do it:
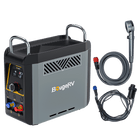
- Access the Coils: For the BougeRV 4000 BTU portable air conditioner, simply slide out the panel without using any tools. If your model requires it, you might need to use a screwdriver to remove the panel.
- Brush Away Dust: Use a soft brush to gently remove dust and dirt from the coils.
- Spray and Wipe: Fill a spray bottle with a mix of warm water and mild detergent. Spray the coils lightly and use a soft cloth to wipe them clean. Avoid soaking the coils.
- Dry Completely: Dry the coils completely before reassembling the unit.
Step 4: Drain the Water Tank
Portable AC units usually have a built-in dehumidifier that collects water in a tank, which needs to be emptied regularly. When it comes to cleaning BougeRV’s 4000BTU portable air conditioner, all you need to do is tilt the unit and pour out the water to empty it.
Step 5: Check and Clean the Hose

Many portable AC units have an exhaust hose that vents hot air outside. This hose can also collect dust and debris over time.
To start, carefully detach the hose from the unit. Next, use your vacuum's brush attachment to clean the inside of the hose. Finally, take a damp cloth and wipe down the exterior of the hose.
Step 6: Clean the Exterior

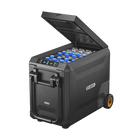
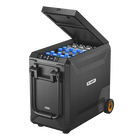
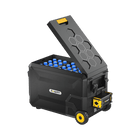
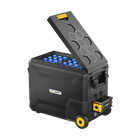
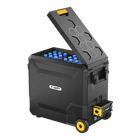
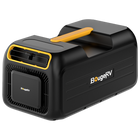
Source: BougeRV 4000 BTU portable air conditioner
After you've done the first five steps, it's time to clean the outside of your portable AC to get rid of dust and grime. This is especially important if you use it often for outdoor camping.
Here's an easy way to do it: Mix some warm water with a bit of mild detergent and dampen a soft cloth with the solution. Wipe down all the outer surfaces, then use a dry cloth to get rid of any leftover moisture.
Step 7: Reassemble and Test
Once everything is clean and dry, reassemble your portable AC unit. Plug it back in and turn it on to make sure it’s working correctly.
Bonus Tips for Maintaining Your Portable AC Unit
- Regular Cleaning: Aim to clean your portable AC unit at least once a month during heavy use periods.
- Check Seals: Ensure that the window seals around the exhaust hose are intact to keep warm air out.
- Store Properly: When not in use, store the unit in a cool, dry place. Clean it before storing it to prevent mold and mildew.
Final Thoughts
There you have it! Cleaning your portable AC unit doesn’t have to be a chore. With these simple steps, you can ensure that your unit not only cools effectively but also lasts longer. Regular maintenance is the key to a happy, healthy cooling system.
So, go ahead, and give your portable AC unit the care it deserves. Trust us, you'll feel the difference when those hot summer days roll around!
Stay cool!


